BeanHub Import - One small step closer to fully automating transaction importing
We all love plain-text accounting. It’s based on open-source tools, so you never need to worry about vendor lock-in. Beancount is among the most popular options, along with others, such as ledger or hledger. You can visit Plain Text Accounting to learn more.
Unlike plain-text accounting, proprietary software users always worry about whether the company will shut down and the tool they use will no longer be supported. For example, the popular budgeting app Mint was shut down, and millions of its users were forced to migrate to Credit Karma instead.
Importing data from bank or credit card accounts is the most painful, time-consuming, and error-prone part of using plain-text accounting. After I started using Beancount to manage my financial data, I always dreamt of making it fully automated. I envision that every day, I wake up, sip tea, and open my Beancount app, and it would already have all the transactions imported without me doing anything. Software should serve us, not the other way around.
Although we are not there yet, we are one small step closer to that dream today. We are glad to announce that the new BeanHub Import feature is available. Also, we are finally leaving the beta stage.
In addition to the awesome new import feature, to make BeanHub more accessible, we added a private repository for free users with a 1,000-entry limit for that repository! Here’s the updated version of the pricing:

BeanHub Import
There are already countless open-sourced Beancount import tools out there. But none of them meet all of our requirements. The problems of existing import tools are:
- Extract logic coupled with transaction generation, making it unreusable
- Need to write code in Python or other programming languages
- Duplication due to unawareness of previous imported transactions
- Cannot merge data from different file sources
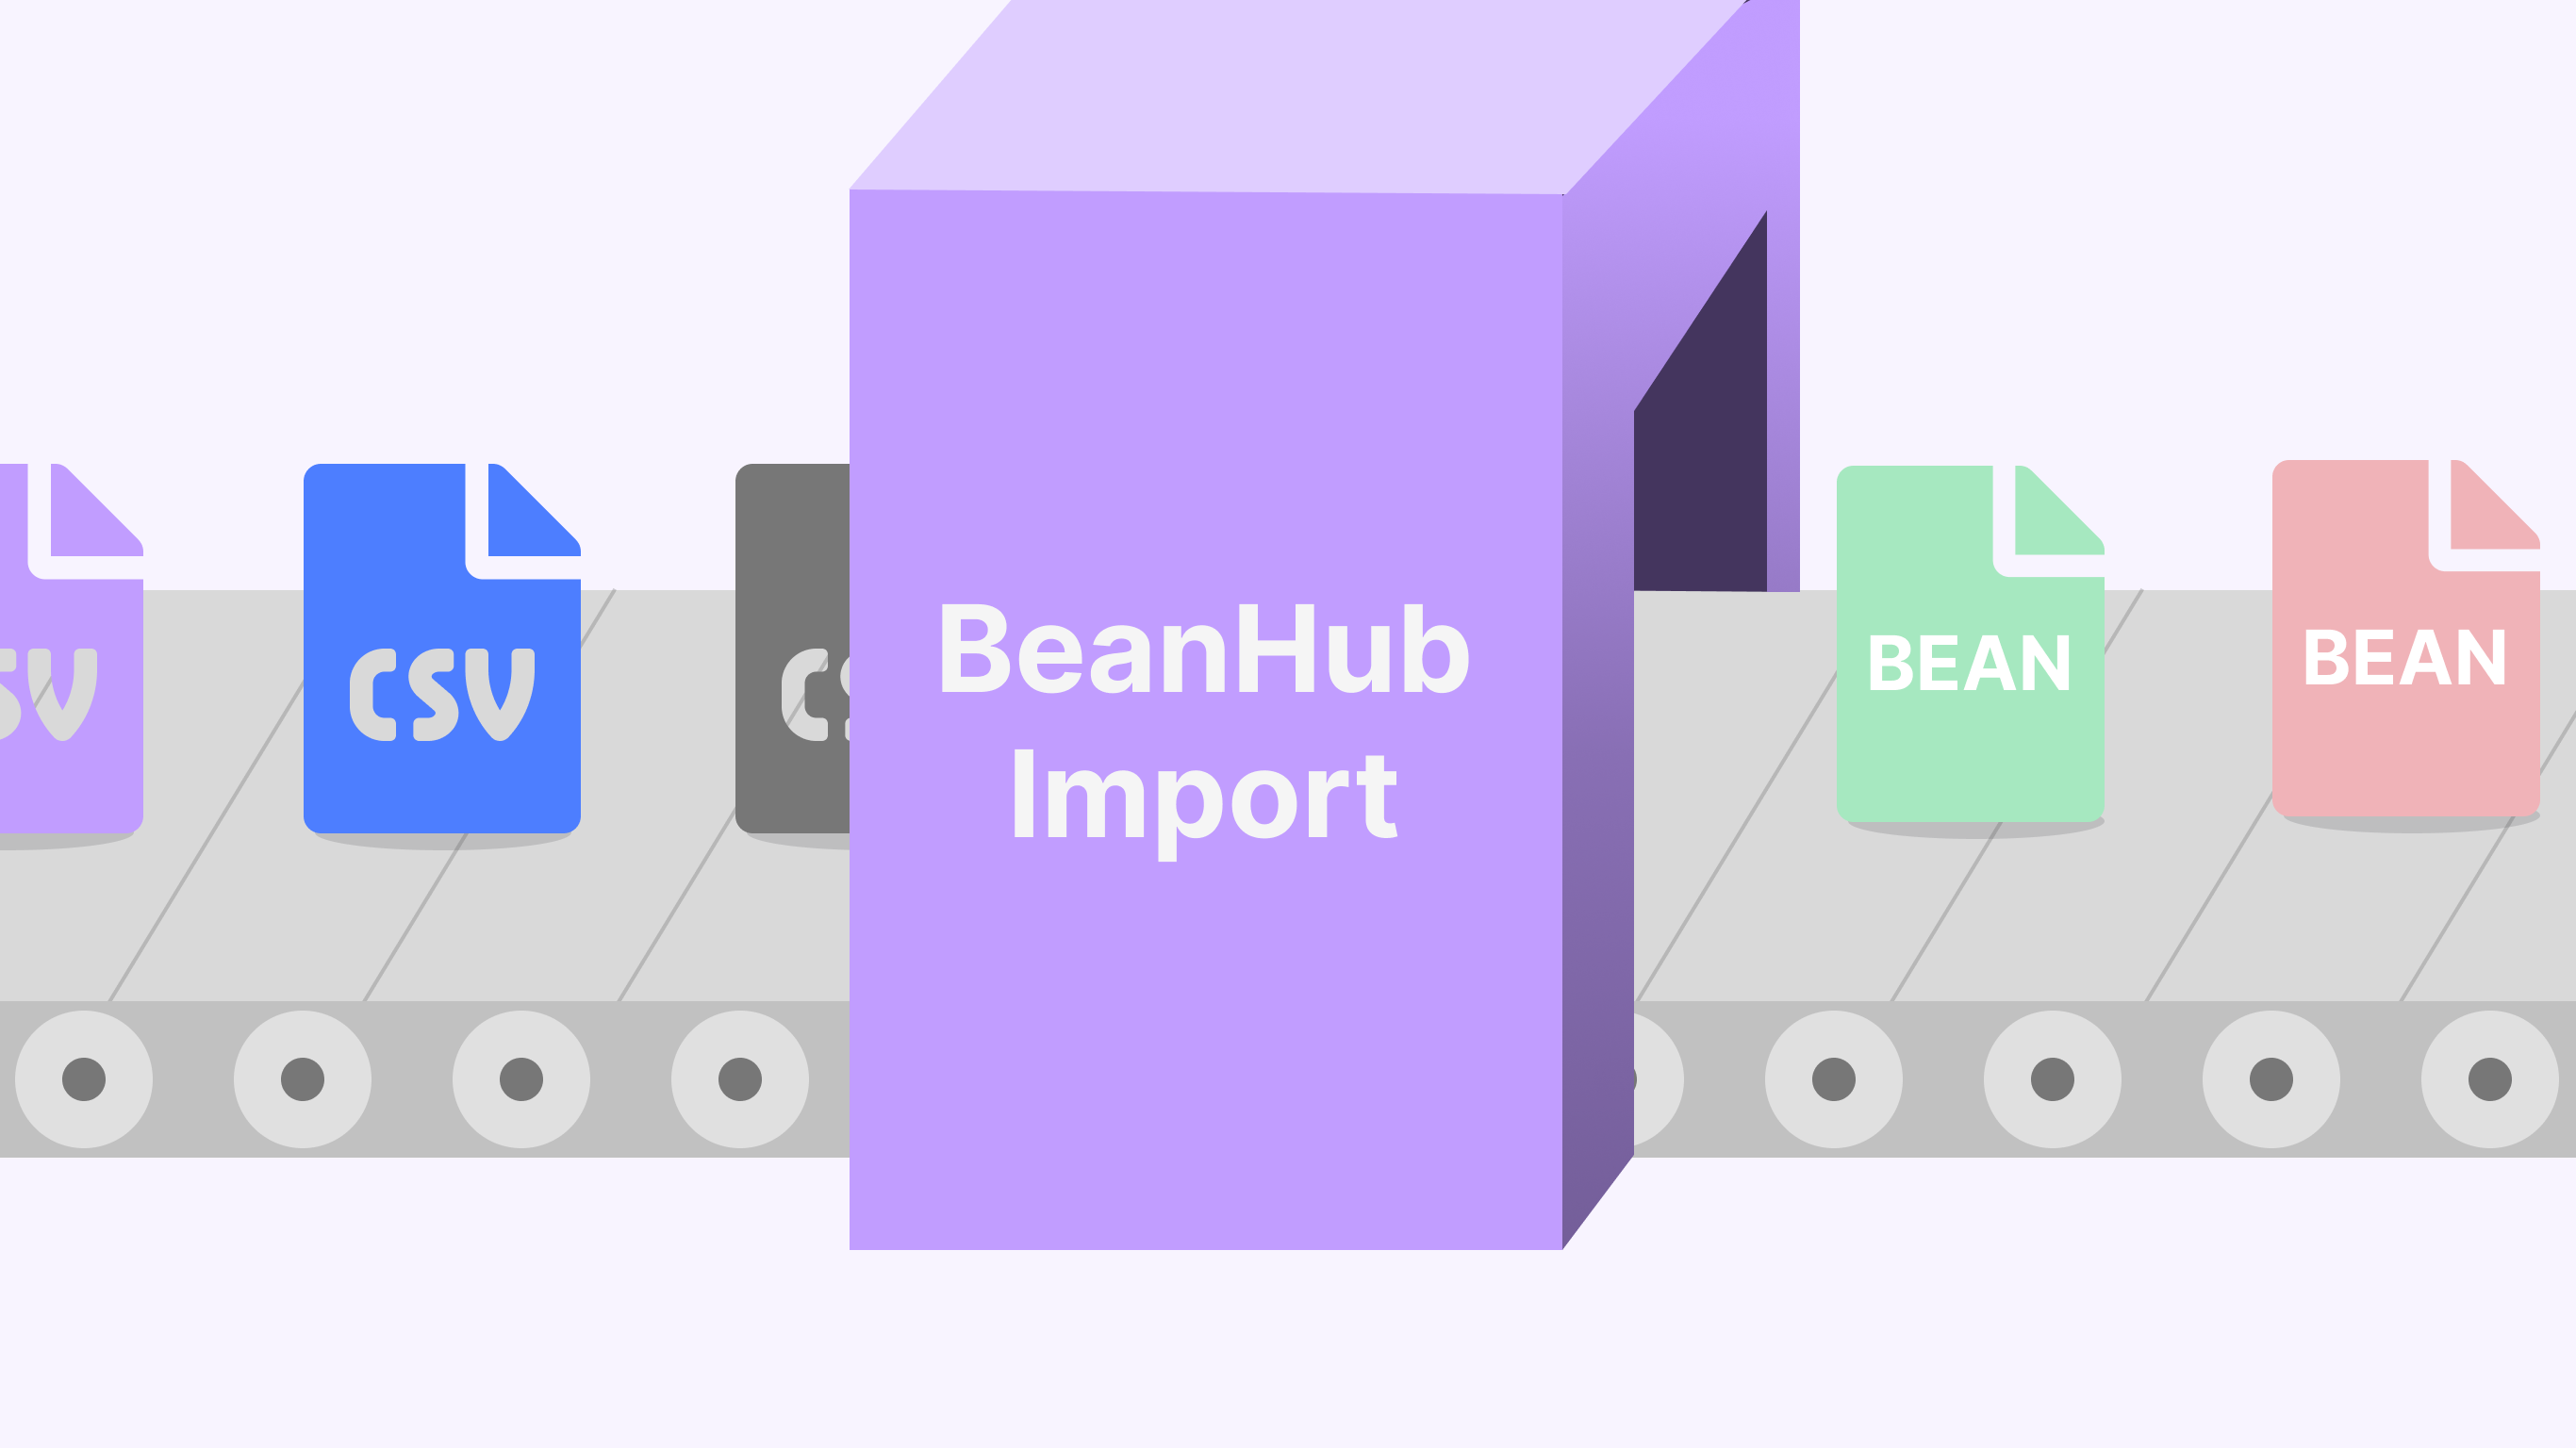
To solve the problems, we build our own import tool. Instead of making one import tool extract transactions and generate Beancount transactions simultaneously, we built extractors solely for extracting CSV files into a standardized structure. We built another tool to import transactions extracted from the extractors based on pre-defined rules. To get an idea of how our import system works, here’s the flow diagram:

In a nutshell, we are adopting a data pipeline approach for processing and importing transactions from bank account CSV files into Beancount transactions.
We also adopted our previous open-source tools, beancount-parser, and beancount-black, for parsing and formatting the Beancount transactions.
Therefore, our importing tool is fully aware of existing transactions in your Beancount files and knows where to update, remove, or insert them.
We also introduce a new import-id metadata key for each generated transaction to make deduplication possible.
With that, we can easily find and match the transactions added in the past and update them accordingly.
While this might sound like a stupid business decision, we always try our best to ensure as little vendor lock-in as possible for users who adopt BeanHub. We hope that even if BeanHub is no longer around one day, people who rely on it won’t be abandoned. That’s why we previously open-sourced our BeanHub Forms feature. Likewise, we also open-sourced BeanHub Inport’s core libraries: beanhub-extract for extracting transactions and beanhub-import for running the rule-based import. These two libraries aren’t meant for end-users to use them directly. You can install our beanhub-cli tool to run the import locally.
BeanHub import rules are defined in a YAML file at .beanhub/imports.yaml.
Here’s an example of it:
# the `context` defines global variables to be referenced in the Jinja2 template for
# generating transactions
context:
  routine_expenses:
    "Amazon Web Services":
      account: Expenses:Engineering:Servers:AWS
    Netlify:
      account: Expenses:Engineering:ServiceSubscription
    Mailchimp:
      account: Expenses:Marketing:ServiceSubscription
    Circleci:
      account: Expenses:Engineering:ServiceSubscription
    Adobe:
      account: Expenses:Design:ServiceSubscription
    Digital Ocean:
      account: Expenses:Engineering:ServiceSubscription
    Microsoft:
      account: Expenses:Office:Supplies:SoftwareAsService
      narration: "Microsoft 365 Apps for Business Subscription"
    Mercury IO Cashback:
      account: Expenses:CreditCardCashback
      narration: "Mercury IO Cashback"
    WeWork:
      account: Expenses:Office
      narration: "Virtual mailing address service fee from WeWork"

# the `inputs` defines which files to import, what type of beanhub-extract extractor to use,
# and other configurations, such as `prepend_postings` or default values for generating
# a transaction
inputs:
  - match: "import-data/mercury/*.csv"
    config:
      # use `mercury` extractor for extracting transactions from the input file
      extractor: mercury
      # the default output file to use
      default_file: "books/{{ date.year }}.bean"
      # postings to prepend for all transactions generated from this input file
      prepend_postings:
        - account: Assets:Bank:US:Mercury
          amount:
            number: "{{ amount }}"
            currency: "{{ currency | default('USD', true) }}"

# the `imports` defines the rules to match transactions extracted from the input files and
# how to generate the transaction
imports:
  - name: Routine expenses
    match:
      extractor:
        equals: "mercury"
      desc:
        one_of:
          - Amazon Web Services
          - Netlify
          - Mailchimp
          - Circleci
          - WeWork
          - Adobe
          - Digital Ocean
          - Microsoft
          - Mercury IO Cashback
    actions:
      # generate a transaction into the beancount file
      - file: "books/{{ date.year }}.bean"
        txn:
          narration: "{{ routine_expenses[desc].narration | default(desc, true) | default(bank_desc, true) }}"
          postings:
            - account: "{{ routine_expenses[desc].account }}"
              amount:
                number: "{{ -amount }}"
                currency: "{{ currency | default('USD', true) }}"

  - name: Receive payments from contracting client
    match:
      extractor:
        equals: "mercury"
      desc:
        equals: Evil Corp
    actions:
      - txn:
          narration: "Receive payment from Evil Corp"
          postings:
            - account: "Assets:AccountsReceivable:EvilCorpContracting"
              amount:
                number: "{{ -amount / 300 }}"
                currency: "EVIL.WORK_HOUR"
              price:
                number: "300.0"
                currency: "USD"

  - name: Ignore unused entries
    match:
      extractor:
        equals: "mercury"
      desc:
        one_of:
        - Mercury Credit
        - Mercury Checking xx1234
    actions:
      # ignore action is a special type of import rule action to tell the importer to ignore the
      # transaction so that it won't show up in the "unprocessed" section in the import result
      - type: ignore
To learn more about the import rule and its schema, please visit our beanhub-import GitHub repository.
At this moment, beanhub-extract only supports CSV files from a few banks. We are working hard to expand the supported banks. Since it’s an open-source project, please feel free to open a pull request or file an issue in the GitHub repository if the extractor for your bank is not supported yet.
Upload import file
To import a CSV file with BeanHub, you can use the newly added import upload file feature.
You can find the Import button in the left-hand-side menu.
You can then click Upload Files to see the uploaded files.

Next, click the Upload File button on the upper-right corner to upload a file.
The upload file feature will compare the uploaded file with the previous CSV input files in the repository.
For example, you have an input CSV file at import-data/mercury/2024.csv for your Mercury transactions for the whole 2024 year.
Now, you export the CSV file for 2024 again, and it contains more transactions.
You can simply upload it, and BeanHub will find out which previous CSV file you are trying to update and set the file path for you to override it.
You can review the path it found for you before running the import:
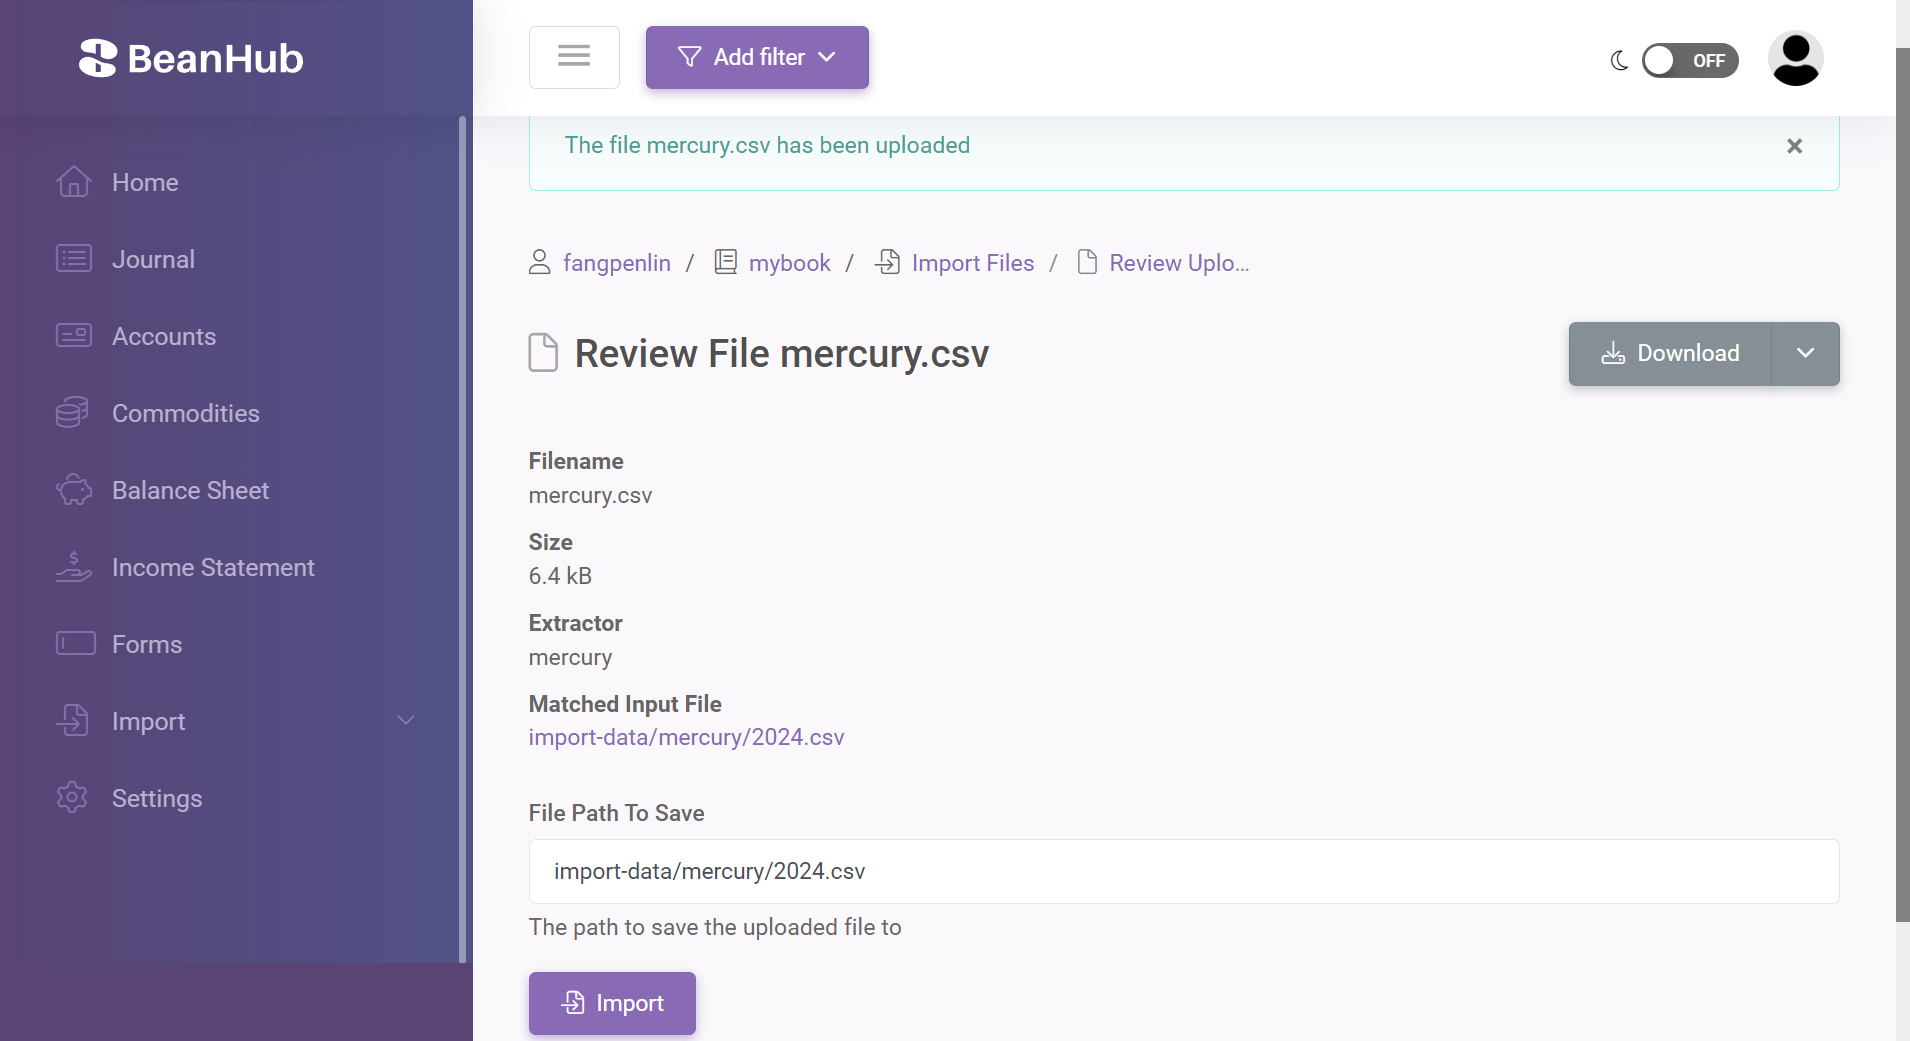
Once you click the Import button, the uploaded CSV file will be written to the given path, and beanhub-import will run to generate new transactions or update existing ones for you.
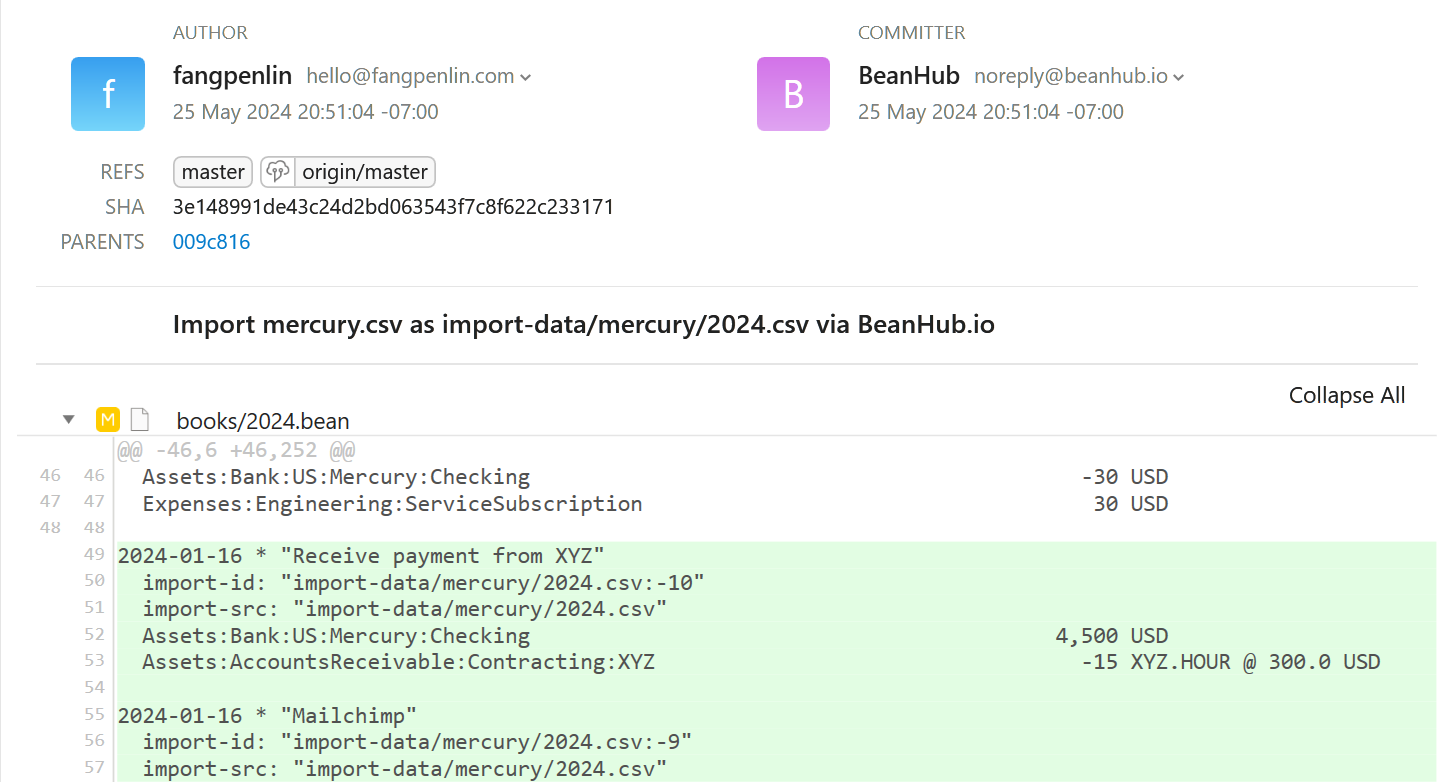
And here you go, all the new transactions from the uploaded CSV file were added in a new commit for you like this:
What about those transactions that do not match my import rules? Currently, we only add new transactions generated from import rules, but we will provide a new feature for you to easily input the ones that are not matched by rules.
Run import locally
From time to time, you may want to try out your BeanHub Import rules before you push them to the BeanHub. Or, you prefer to run the import locally and commit the changes yourself, then push it to BeanHub. Either way, you can use the BeanHub Import powered by BeanHub CLI.
You need to install it first. It’s a Python package, so you need to have Python installed. Then you can run this to install it:
pip install beanhub-cli
Once you have it installed, you can then run the following command in your BeanHub repository folder:
bh import
Easy! To try it out yourself, you can clone our beanhub-import-demo repository to experiment.
New repository template
One more thing. We also updated our project template beanhub-beancount-cookiecutter to include all the necessary data and configurations so you can try out BeanHub’s new feature. We also added a README that shows you what you can do with the repository.
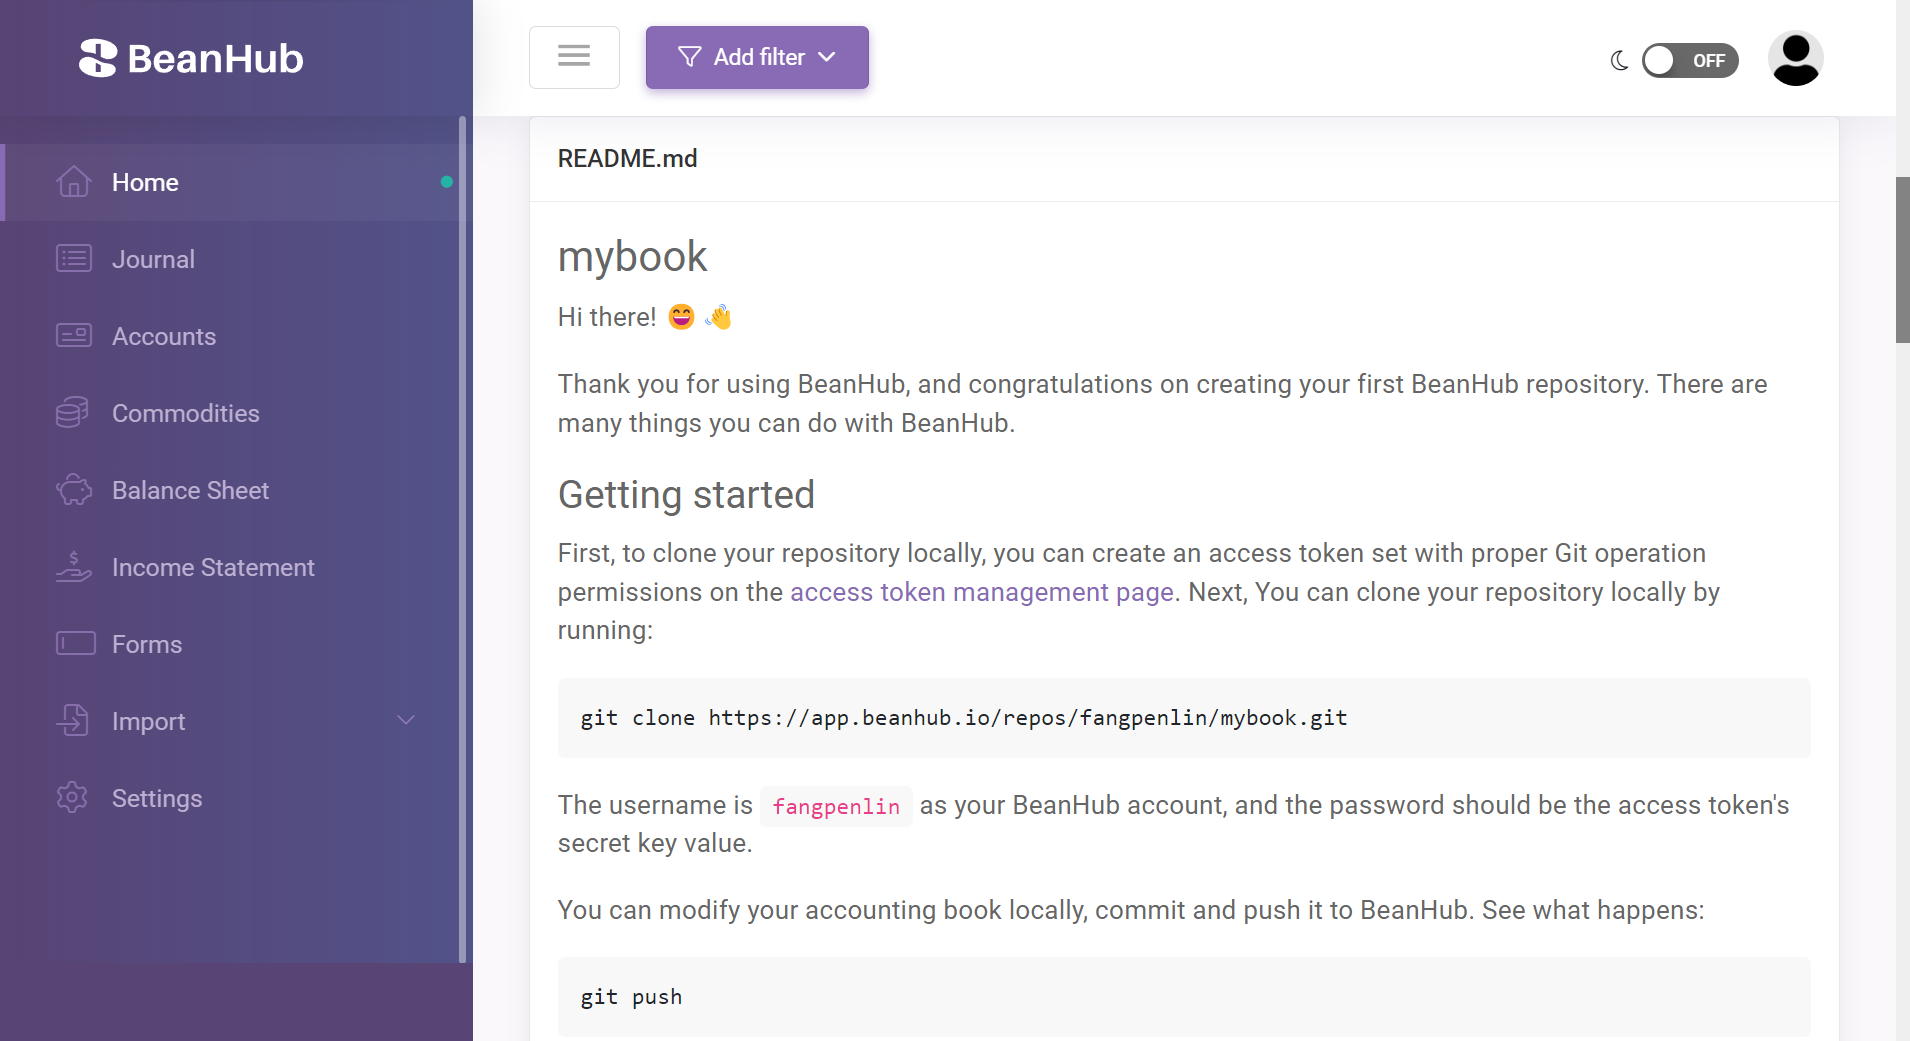
Since a private repository is now available to free users, we highly recommend you create a new private BeanHub repository with the sample project option and follow README’s introduction to try it out yourself.
More to come
The new import feature makes importing a CSV exported from your bank account easier than ever. However, you still need to export the CSV files and upload them to BeanHub manually. What if I tell you that in the near future, we will provide automatic periodic transactions importing features from almost all the banks? Yes! We are currently working on it and will release it soon. We will raise our plan price accordingly after we release the new feature. Subscribe now while the price is still low.
Finally, as always, please don’t hesitate to contact us at support@beanhub.io if you have any questions or feedback!